00:00:10.490
All right, I think we can start. I’d like to begin by thanking all of you for attending this talk. It's my very first RailsConf, and I’m very excited to be here. Thank you so much. I would also like to thank Shopify for sponsoring this event and giving me the opportunity to share the work we've been doing in our team. Today, I’d like to talk and share with you our process of upgrading Rails and how we were able to run our release candidate version in production.
00:00:29.760
Our app is currently running on Rails 5.2, which was released last week. Since we were running on Rails 5.1 and planning to release candidate 2, I'll try to explain why this was a significant milestone for us and how the open-source community will benefit from it. But first of all, let me introduce myself. My name is Edouard Chin, and I’m a developer at Shopify working on our internal Ruby on Rails team. You can find me on GitHub as well as on Twitter under a weird handle.
00:01:01.140
As a preamble, if you attended RailsConf last year or even if you watched the recording on YouTube, you might have seen Rafael Franca talk about how we upgraded Rails from 4.2 to 5.0. It was a massive project that lasted a year. This talk is not intended to be a repetition of his but rather a continuation of our work—the improvements we've made in our process and the new tooling we've created to help us. Hopefully, by the end of this talk, you will be able to upgrade your application quickly and smoothly by reusing some of the ideas I will discuss.
00:01:30.600
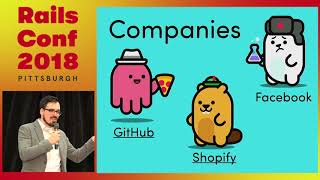
If you haven't seen Rafael's talk, don’t worry too much; although I definitely recommend watching it, I will provide enough context for you to understand. So, speaking about context, what is Shopify? Shopify is a cloud-based e-commerce platform that has been running in production since 2006. For over 12 years now, we have powered more than 600,000 businesses all over the world. As a merchant, you are able to manage your store across multiple sales channels, including web, mobile, and social media.
00:02:03.390
Our motto is pretty simple: make commerce better for everyone. Our core application is quite large, and I think it might be the biggest Ruby on Rails application currently running in production. This is a screenshot I took from our GitHub repository a couple of weeks ago. As you can see, we have around 300,000 commits and over a thousand contributors. Our application has a long history with Rails, and our current CEO was already using the very first Rails version that DHH sent him over email—probably around 13 years ago.
00:02:44.250
It was a zip file. Since then, we've never stopped upgrading our app, continually improving the codebase over the years, as well as keeping many dependencies up-to-date. We have around 250 direct dependencies and more than 400 indirect ones. As you might expect, upgrading Rails in a larger application is not an easy task. We have managed to do it successfully over the years, but it takes a lot of effort and resources.
00:03:05.430
This is a graph that shows the comparison between when Rails was released and what version of Rails Shopify was using. As you can see, we're not too far from each other. One reason for this is that for at least a couple of years, we've had the idea of pointing our app to the head of Rails. By doing this, we can gain immediate access to new features, bug fixes, and improvements as soon as they get merged upstream. There’s also another advantage: both Rails and our application will directly benefit.
00:03:50.730
Let me explain: our test suite is at the same scale as the monolith itself and contains over 80,000 tests. By running Rails on such a large application that has that many tests, we can detect a lot of potential issues or regressions that might have been introduced upstream. Of course, even though we have a lot of tests, that doesn't guarantee all of them will pass, but at least we'll be able to identify edge cases that might not have been discovered yet. It has been about three years since we had this idea of using the master branch on GitHub.
00:04:30.000
So why did it take so long? In the previous couple of months, we were able to achieve this big milestone. Let me give you some context on how we were doing things previously, the lessons we learned, and what our new process entails. When we start upgrading Rails, we prepare our application for dual booting. If you have an app and you manage your dependencies using Bundler, I’m sure you have a Gemfile looking something like this, and a Gemfile.lock that corresponds to it.
00:05:01.830
At Shopify, it’s almost exactly the same, but we have a Bundler monkey patch. I won't delve into the Bundler monkey patch since it's not clean, but it works quite well. There are other ways to make it cleaner, but that’s not the important part. You will probably want to focus on these few lines of code here. This reliance code will instruct Bundler to get the dependencies from another snapshot whenever the SHOPIFY_NEXT environment variable is present.
00:05:40.500
In a typical application where dependencies are managed with Bundler, when you run `bundle install`, the dependencies resolve from the regular Gemfile.lock. In our case, if we add the SHOPIFY_NEXT environment variable, it will grab dependencies from the Gemfile next block. To summarize, we have two snapshots, and we control which one gets picked up by adding or removing an environment variable. This way, we can run our application and tests very easily and quickly on two versions of Rails.
00:06:10.890
The second thing we take care of when we upgrade Rails is fixing any issues that might occur during the building process, anything from broken initializers to broken code that was eagerly loaded, and anything like that. The main goal for us is to be able to run our test suite. And when I say running our test suite, I don’t mean that all the tests will pass; at least they need to start. Because at this point, we know that a lot of tests will fail, and when I say a lot, I mean literally thousands.
00:06:38.370
The last step, which takes probably 95% of the total time needed to upgrade, is fixing all those issues—and that’s where the fun begins. Until very recently, a small team was handling the task of fixing all the problems, and while we were sorting these issues out, the train was still moving. Developers working on the application were merging code that worked fine on the current version of Rails but broke in the next version, which further complicated the upgrade process.
00:07:05.520
That is one lesson we learned: we did not stop the bleeding. One solution to this problem would have been to add a new CI check. Basically, instead of testing code on one version of Rails, we would test on two: one for the current version of Rails that's running in production, and the other for the next version of Rails. This is actually what we ended up doing, but only after we fixed all the tests.
00:07:40.680
After a few months, we enabled CI, and we stopped the bleeding at the very end when there was no more bleeding. The reason we could not enable CI initially was that we had too many failures. Having a CI that is constantly red is not very useful. If a developer pushes code that is not working on Rails next, there is no way for us to differentiate it due to the number of existing failures. This will give you context on how we were doing things previously, and as you can see, the main pain point was about keeping track of issues and stopping the bleeding on our side.
00:08:10.260
We thought about the problem and realized that we would never be able to achieve our long-term goal—pointing our app to the master branch of Rails—because the upgrade cycle was taking way too much time and effort. In fact, the effort spent on a full upgrade cycle was almost equal to the time the Rails team spent on releasing a new Rails version. Thus, we created a new set of tools that we ended up trying during the 5.0 to 5.1 upgrade.
00:08:45.240
This was a few months ago, and it turned out that this upgrade was actually the fastest and smoothest we've ever done. So how does that work? It's not that different from how we prepare our application for dual booting; we still fix any issue that may arise during the booting process and, lastly, here comes the new part: we enable CI right away. We want to stop the bleeding at the very beginning.
00:09:12.300
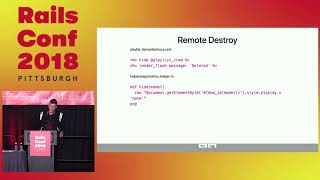
But I just said a moment ago that enabling CI at the beginning was not possible due to the number of failures we had. So our idea was to allow CI to fail only when new code is introduced. Any existing broken tests would be marked and allowed to fail. This is a concrete example of what I’m talking about. If a test fails for any reason, we mark it, and even if it’s failing, it will be marked as passing.
00:09:40.500
Let me explain how this works a bit more. First of all, we use a marking declaration to mark tests. This syntax might remind you a little of Rake tasks, where you define a task and can add a description for it. Similarly, in our case, we want the mark to apply only to that specific test and not others. The marking feature comes from a small module that we created, and while it’s not too complex, it’s a crucial piece that allows us to mark tests with various tags.
00:10:14.020
For example, we might mark tests that are failing in Rails next, but we also use it to mark tests that are too slow and other similar issues. The marking module comprises a bit of meta-programming. I'm going to break that down into smaller chunks for clarity. Each time the marker gets included inside a test class, we create a class variable called metadata—the metadata is simply a hash where the keys are any tags passed to the mark_as method.
00:10:37.210
The value will be an array containing the names of the tests that were marked with those tags. For each tag, we create macros that help us check whether a test is marked or not. Then we create a hook; the method hook is not commonly used, but it works similarly to popular hooks like included and extended. The hook gets triggered by Ruby as soon as a method gets defined, so when the mark_as method is called, we define the hook, which is triggered when the next test gets defined inside the hook body.
00:11:00.700
We fill our metadata hash, and lastly, we remove the hook to prevent any other tests from triggering it. Each time the mark_as method gets called, we repeat the entire process. This is an example of how we include the marking module: we have two tests being marked with various tags in the background, and that’s what the metadata hash will look like. The keys represent the tags, and the value is an array of the test names, which allows us to check if a test is marked or not.
00:11:25.370
So that’s how we mark and manage our tests. Now, moving forward, how can we utilize these marks? For this, we rely on a Minitest reporter. I won’t have enough time to delve into the details of how Minitest works, but if you saw Ryan's talk yesterday about Minitest, you’ll know what I mean. You might have seen this output if you’ve ever run tests using Minitest, whether it be RSpec or something similar.
00:11:50.000
Basically, two reporters ship with Minitest by default: the progress reporter, which shows you the progress of your tests, and the summary report, which outputs a summary of your tests after all the tests have run. You might be wondering how the reporters know about your tests. When Minitest runs, each test stores the result of its execution in a result object. That object contains information about the run, such as the number of assertions, the time taken to run, and any failures.
00:12:10.800
In our case, the result object gets passed to all the reporters one by one, and when they finish, Minitest exits with a shell exit code—zero for success and anything but zero for failure. That's what your CI looks for to determine if your script succeeded or failed. Now that we understand the mechanics behind this, let’s take a look at the reporter we developed. It's called the Rails next reporter, designed to mutate the result object intrinsically.
00:12:34.200
When the after_test method triggers by a hook, it receives an argument: an instance of your test. Inside this method, we check to see if we know the test is going to fail. First, we verify if we're running on Rails next because for tests not related to that, we do not want to alter the run result. The failures we may have on Rails next should only be applied to that version. Lastly, we check if the test is marked, and if both conditions are met, we simply set a flag.
00:13:00.920
When Minitest calls the record method, it receives the result object that contains details about the run. Inside the method, we check if the flag is set. If so, we clear the failures since they won't affect this specific test run. Consequently, that same mutated result object gets passed on to the reporters, which will not see any failures because we cleared them. Hence, it allows Minitest to view this as a green test, leading to a more accurate result.
00:13:29.900
I realize this might sound complex, but it genuinely simplifies our testing workflow. Lastly, I should mention that in the after_test hook, we had to work around certain limitations since, inside the record method, we no longer have an instance of the test itself. That’s why our CI strategy does not promote skipping over marked tests. The reason is straightforward: marking tests as skipped yields the same outcome as passing them. If a dev intends to fix a test, any changes made during the process will likely resolve additional broken tests.
00:14:00.000
If we just skip those tests without addressing failures, there's no way to differentiate which tests aren't genuinely passing anymore. As a result, we want to ensure that tests which are failed in Rails next but should not be marked will effectively show failures—allowing our CI to fail to indicate that we need to revisit those tests. This approach may seem aggressive, but it ensures precise tracking of those that need fixing and highlights our progress. While I mentioned previously that we recently transitioned to this process, it has already shown significant improvements.
00:14:41.250
Enabling CI from the very beginning was immensely beneficial. Not only did we stop the bleeding, but it also ensured developers maintained a green CI when merging pull requests, which prompted them to fix any broken code quickly. This improvements it propagated to other tests, which had a compounding positive effect. One additional key factor contributing to the speed of the upgrade was workforce: more people involved meant less time spent fixing all the issues. A year ago, Shopify started a project called Componentization.
00:15:12.000
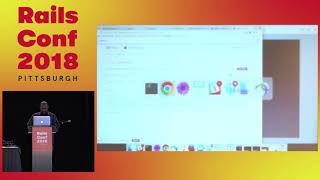
While this project wasn't directly related to the Rails upgrade, it significantly assisted in identifying good ownerships or what we call 'captains' for components. Componentization is quite a broad topic, and I won't delve into it in detail, but the core goal was to foster effective app development, enhancing both organization and component design. This is a concrete example of how our app looked prior to and after componentization.
00:15:43.290
Previously, it resembled a typical Rails application, while now there's a more organized component folder housing individual components. The structural integrity of each component resembles a small Rails application in itself, containing everything from models, views, controllers, to tests. To prevent cluttering this talk with screenshots, I've excluded all except one component used as an example, but we have around three components overall. So how does this help with upgrades?
00:16:15.300
With componentization, we now have a natural way to identify which code belongs to which component, enabling us to count failures per component. We also created a shared spreadsheet to track those failures by asking every team to assist in fixing issues pertaining to their components. Moreover, we updated the spreadsheet weekly to reflect our progress, allowing us to gamify the process so that teams worked harder to ensure their components were all green.
00:16:41.120
Having so many developers involved in the upgrade process was tremendous. They learned a lot about where their code stood and what had changed in the framework. As a result, our test suite is now entirely green. I mean it when I say this. It is really green! What’s next, you might ask? Well, after ensuring we’re fully prepared, we decided to enable deprecation logging in production.
00:17:07.780
By default, a Rails application does not log deprecations when created. Since we had resolved all errors, we assumed we shouldn't have deprecations either. However, we were concerned about persistent tests returning fine results in production. By enabling deprecation logging, we were able to identify areas of untested code, allowing us to address these issues and add coverage. Consequently, when we deployed Rails 5.1 in production, there were zero new exceptions related to the upgrade.
00:18:02.000
If you want to reproduce this on your app, the process is simple: just enable the configuration to log deprecations. However, do be warned that this could clutter your logs with deprecation warnings if you're handling multiple requests. For high-load requests, we learned to adjust our logging to avoid clutter. Instead of logging, simply set it to notify, which is the default; this way, you get notified every time a deprecation occurs without overloading the log.
00:18:25.000
In our case, we created two simple subscribers: one to keep track of all deprecations caused by a response in a request and another one to actually log those deprecations to help pinpoint any that need attention. The key to this process is ensuring our subscribers are well-structured, so they handle their respective namespaces and notifications without conflict. This setup contributes significantly to our ability to properly manage deprecations.
00:19:00.750
Once we had everything in place, we were fully ready to deploy Rails next into production. Our rollout strategy involved deploying Rails only to a small percentage of our data centers, effectively reducing the risk of a total platform outage should anything break. If there are problems, only a limited number of customers would be impacted. This allows for plenty of slack whenever Shopify deployments occur, typically starting with low values like 1% or 5%.
00:19:35.000
After deploying, we also profiled our application and received sampling call stacks; we performed profiling twice—once for servers running on the current version of Rails and once for the upgraded version. We then compared these call stacks to identify any new code consuming too many CPU resources, aiming to verify there weren't any performance regressions.
00:20:00.120
Once all our data centers were running on Rails next, we could dispose of the Bundler monkey patch, allowing us to celebrate as we officially upgraded our application. There is, however, one last thing I didn't mention that's important during an upgrade: managing deprecations. A significant number of upgrade challenges can be pre-emptively addressed if you start dealing with deprecations immediately upon their introduction in your codebase.
00:21:01.400
The decision on our side is straightforward: introducing new deprecations is not allowed. If that happens, CI will fail, unless there is sufficient justification, like if we are trying to deprecate our own code or we just upgraded a gem that introduced new deprecations—these exceptions are evaluated on a case-by-case basis. Just issuing a deprecation warning in the console is not an effective way to keep track of them, which can lead to confusion.
00:21:53.470
To help with this, we created a deprecation toolkit gem that records all distinct deprecation warnings triggered in your system during a test run and saves this information for future comparisons. The next time tests are executed, the toolkit checks for any mismatch between the recorded warnings and those triggered, alerting us if a new deprecation was introduced. This tactic, we believe, is essential to effectively managing deprecations while we resolve existing ones.
00:22:41.300
We plan to open-source this gem in the coming weeks. By reusing all the ideas mentioned in this talk, we drastically reduced the time needed to upgrade Rails—though it still requires effort, taking around three to four months. It may become increasingly difficult to shorten this time even further. As I noted earlier, there are many advantages to pointing our app to the head of Rails—primarily the ability to upgrade more rapidly and frequently.
00:23:14.500
However, each upgrade will require a non-negligible amount of time. The goal is to transition from large upgrades that take months to smaller, routine upgrades. Typically, the Rails team is very diligent in their efforts to prevent bugs within the framework, but just like all software, bugs can occur. There is a minimal risk associated with pointing our app to the head of Rails, as our application is among the first to try out every commit upstream. We have weighed the risks against the rewards and are confident in our testing framework.
00:24:01.750
The balance we struck between the risks we assume and the advantages we gain is undoubtedly worthwhile. Additionally, it provides an excellent opportunity for us to give back to the open-source community, not only for the Rails project itself but also for the broader Rails ecosystem. If we encounter any issues in any of our dependencies—and we have quite a few—we can report or resolve problems so that other applications do not face these challenges.
00:24:52.420
This was our journey in upgrading a gem, and I specifically state 'gem' rather than simply 'Rails' because everything I discussed can actually apply to any gem upgrade. If you’re planning to upgrade a dependency that requires significant effort and need a structured approach to do it progressively while preventing issues, consider documenting all deprecations and maintaining tracking systems. Thank you for attending. I hope you found this talk insightful.